
In the previous article, we took a quick look at a new source-to-image (S2I) builder image designed for building and deploying modern web applications on OpenShift. While the last article was focused on getting your app deployed quickly, this article will look at how to use the S2I image as a “pure” builder image and combine it with an OpenShift chained build.
As mentioned in the previous post, most modern web apps now have a build step. Common workflows done in the build step are things like transpiling your code, concatenating multiple files, and minifying. Once these workflows are done, the resulting files, which are static HTML, JavaScript, and CSS, are put into an output folder. The location of the folder usually depends on the build tools you are using, but for something like React, the location is ./build (more on this location in a minute).
This post isn’t going to go into the “what and how” of S2I; you can read more here, but we should understand two of the phases that happen in order to better understand what the Web App Builder image is doing.
The assemble phase is very similar to what happens when running docker build. The result of this phase will be a new Docker image. This phase also happens when a build is run on OpenShift.
For the Web App Builder image, the assemble script is responsible for installing your app’s dependencies and running your build. By default, the builder image will use npm run build, but that can be overridden by providing an NPM_BUILD environment variable.
As I said before, the location of your “built” app depends on the build tools you are using. For example, React uses ./build, but an Angular app uses project_name/dist. And, as you saw in the previous post, this output directory, which defaults to build, can be overridden using the OUTPUT_DIR environment variable. Since there are differences in output locations between frameworks, you copy the generated output into a common directory inside the image, /opt/apt-root/output. This will be important further down this post, but first let’s take a quick look at the next phase, the run phase.
This phase is run when docker run is called on the newly created image from the assemble phase. This is also what is run during an OpenShift deployment. By default, the run script will use the serve module to serve the static content located in the common output directory mentioned above.
While this works for getting your app deployed quickly, it is not really the recommended way of serving static content. Since we are really serving only static content, we don’t really even need Node.js installed in our image. We just need a web server.
This situation—where our building needs are different from our runtime needs—is where chained builds can help.
To quote the official OpenShift documentation on chained builds:
"Two builds can be chained together: one that produces the compiled artifact, and a second build that places that artifact in a separate image that runs the artifact."
What this means is that we can use the Web App Builder image to run our build, and then we can use a web server image, like NGINX, to serve our content.
This allows us to use the Web App Builder image as a “pure” builder and also keep our runtime image small.
Let’s take a look at an example to see how this all comes together.
This example app, is a basic React application created using the create-react-app CLI tool.
I’ve added an OpenShift template file to piece everything together.
Let’s take a look at some of the more important parts of this file.
parameters:
  - name: SOURCE_REPOSITORY_URL
    description: The source URL for the application
    displayName: Source URL
    required: true
  - name: SOURCE_REPOSITORY_REF
    description: The branch name for the application
    displayName: Source Branch
    value: master
    required: true
  - name: SOURCE_REPOSITORY_DIR
    description: The location within the source repo of the application
    displayName: Source Directory
    value: .
    required: true
  - name: OUTPUT_DIR
    description: The location of the compiled static files from your web apps builder
    displayName: Output Directory
    value: build
    required: false
The parameter section should be pretty self-explanatory, but I want to call out the OUTPUT_DIR parameter. For our React example, we don’t need to worry about it, since the default value is what React uses, but if you are using Angular or something else, you could change it.
Now let’s take a look at the image streams.
- apiVersion: v1
  kind: ImageStream
  metadata:
    name: react-web-app-builder  // 1
  spec: {}
- apiVersion: v1
  kind: ImageStream
  metadata:
    name: react-web-app-runtime  // 2
  spec: {}
- apiVersion: v1
  kind: ImageStream
  metadata:
    name: web-app-builder-runtime // 3
  spec:
    tags:
    - name: latest
      from:
        kind: DockerImage
        name: nodeshift/ubi8-s2i-web-app:10.x
- apiVersion: v1
  kind: ImageStream
  metadata:
    name: nginx-image-runtime // 4
  spec:
    tags:
    - name: latest
      from:
        kind: DockerImage
        name: 'centos/nginx-112-centos7:latest'
First, let’s take a look at the third and fourth images. We can see that both are defined as Docker images, and we can see where they come from.
The third is the web-app-builder image, nodeshift/ubi8-s2i-web-app, which is using the 10.x tag from the Docker hub.
The fourth is an NGINX image (version 1.12) using the latest tag from the Docker hub.
Now let’s take a look at those first two images. Both images are empty to start. These images will be created during the build phase, but for completeness, let me explain what will go into each one.
The first image, react-web-app-builder, will be the result of the “assemble” phase of the web-app-builder-runtime image once it is combined with our source code. That is why I’ve named it “-builder.”
The second image, react-web-app-runtime, will be the result of combining the nginx-image-runtime with the some of the files from the react-web-app-builder image. This image will also be the image that is “deployed” and will contain only the web server and the static HTML, JavaScript, and CSS for the application.
This might sound a little confusing now, but once we look at the build configurations, things should be a little more clear.
In this template, there are two build configurations. Let’s take a look at them one at a time.
  apiVersion: v1
  kind: BuildConfig
  metadata:
    name: react-web-app-builder
  spec:
    output:
      to:
        kind: ImageStreamTag
        name: react-web-app-builder:latest // 1
    source:   // 2
      git:
        uri: ${SOURCE_REPOSITORY_URL}
        ref: ${SOURCE_REPOSITORY_REF}
      contextDir: ${SOURCE_REPOSITORY_DIR}
      type: Git
    strategy:
      sourceStrategy:
        env:
          - name: OUTPUT_DIR // 3
            value: ${OUTPUT_DIR}
        from:
          kind: ImageStreamTag
          name: web-app-builder-runtime:latest // 4
        incremental: true // 5
      type: Source
    triggers: // 6
    - github:
        secret: ${GITHUB_WEBHOOK_SECRET}
      type: GitHub
    - type: ConfigChange
    - imageChange: {}
      type: ImageChange
The first one, react-web-app-builder above, is pretty standard. We see that line 1 tells us the result of this build will be put into the react-web-app-builder image, which we saw when we took a look at the image stream list above.
Next, line 2 is just telling us where the code is coming from. In this case, it is a git repository, and the location, ref, and context directory are defined by the parameters we saw earlier.
Again, line 3, we saw in the parameters section. This will add the OUTPUT_DIR environment variable, which in our example will be build.
Line 4 is just telling us to use the web-app-builder-runtime image that we saw in the ImageStream section.
Line 5 is saying we want to use an incremental build if the S2I image supports it. The Web App Builder image does support it. On the first run, once the assemble phase is complete, the image will save the node_modules folder into an archive file. Then on subsequent runs, the image will un-archive that node_modules folder, which will speed up build times.
The last thing to call out, line 6, is just a few triggers that are set up, so when something changes, this build can be kicked off without manual interaction.
As I said before, this is a pretty standard build configuration. Now let’s take a look at the second build configuration. Most of it is very similar to the first, but there is one important difference:
apiVersion: v1
  kind: BuildConfig
  metadata:
    name: react-web-app-runtime
  spec:
    output:
      to:
        kind: ImageStreamTag
        name: react-web-app-runtime:latest // 1
    source: // 2
      type: Image
      images:
        - from:
            kind: ImageStreamTag
            name: react-web-app-builder:latest // 3
          paths:
            - sourcePath: /opt/app-root/output/.  // 4
              destinationDir: .  // 5

    strategy: // 6
      sourceStrategy:
        from:
          kind: ImageStreamTag
          name: nginx-image-runtime:latest
        incremental: true
      type: Source
    triggers:
    - github:
        secret: ${GITHUB_WEBHOOK_SECRET}
      type: GitHub
    - type: ConfigChange
    - type: ImageChange
      imageChange: {}
    - type: ImageChange
      imageChange:
        from:
          kind: ImageStreamTag
          name: react-web-app-builder:latest // 7
This second build configuration, react-web-app-runtime, starts off in a fairly standard way.
Line 1 isn’t anything new. It is telling us that the result of this build will be put into the react-web-app-runtime image.
As with the first build configuration, we have a source section, line 2, but this time we say our source is coming from an image. The image that it is coming from is the one we just created, react-web-app-builder (specified in line 3). The files we want to use are located inside the image and that location is specified in line 4: /opt/app-root/output/. If you remember, this is where our generated files from our app’s build step ended up.
The destination directory, specified in line 5, is just the current directory (this is all happening inside some magic OpenShift thing, not on your local computer).
The strategy section, line 6, is also similar to the first build configuration. This time, we are going to use the nginx-image-runtime that we looked at in the ImageStream section.
The final thing to point out is the trigger section, line 7, which will trigger this build anytime the react-web-app-builder image changes.
The rest of the template is fairly standard deployment configuration, service, and route stuff, which we don’t need to go into. Note that the image that will be deployed will be the react-web-app-runtime image.
Now that we’ve taken a look at the template, let’s see how we can easily deploy this application.
We can use the OpenShift Client tool oc to deploy our template:
$ find . | grep openshiftio | grep application | xargs -n 1 oc apply -f

$ oc new-app --template react-web-app -p SOURCE_REPOSITORY_URL=https://github.com/lholmquist/react-web-app
The first command above is just an overly engineered way of finding the ./openshiftio/application.yaml template.
The second creates a new application based on that template.
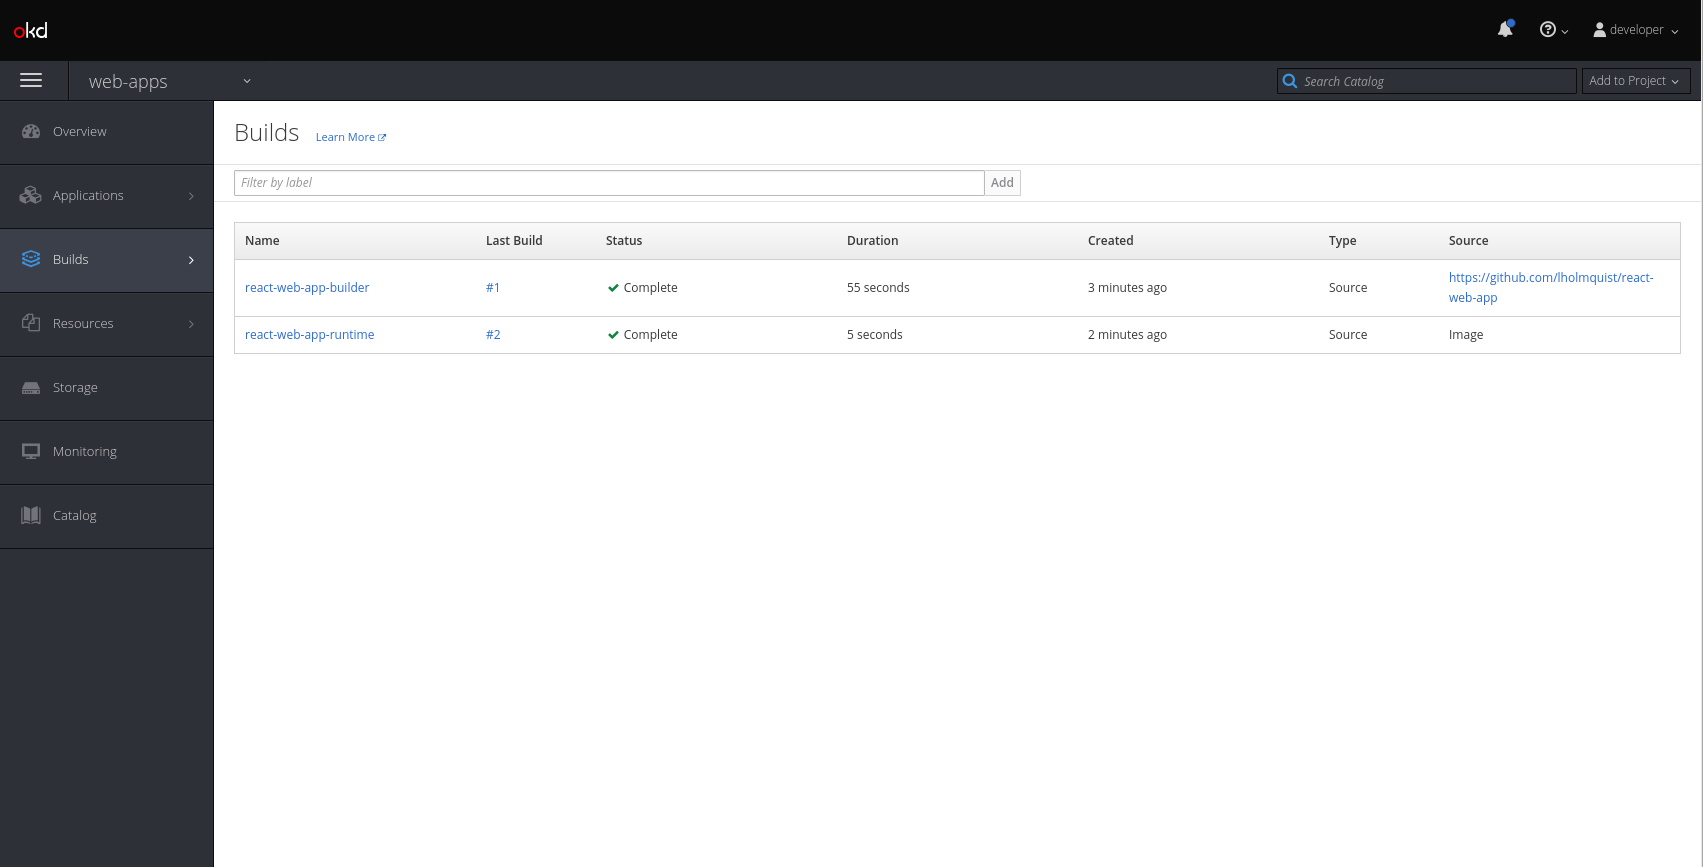
Once those commands are run, we can see that there are two builds:
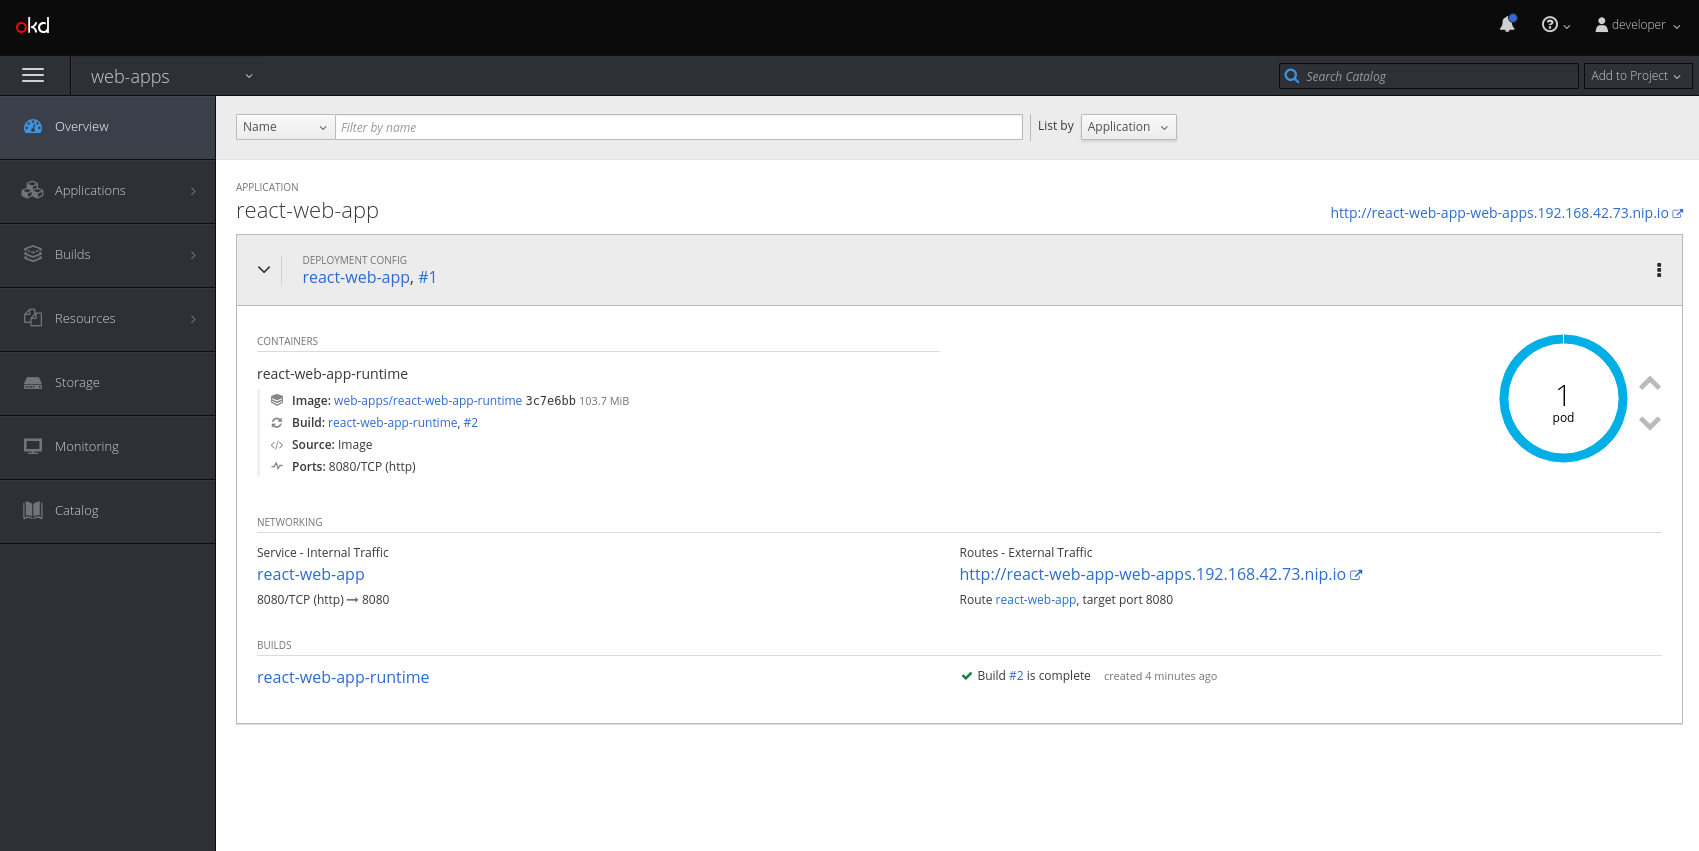
Back on the Overview screen, we should see the running pod:
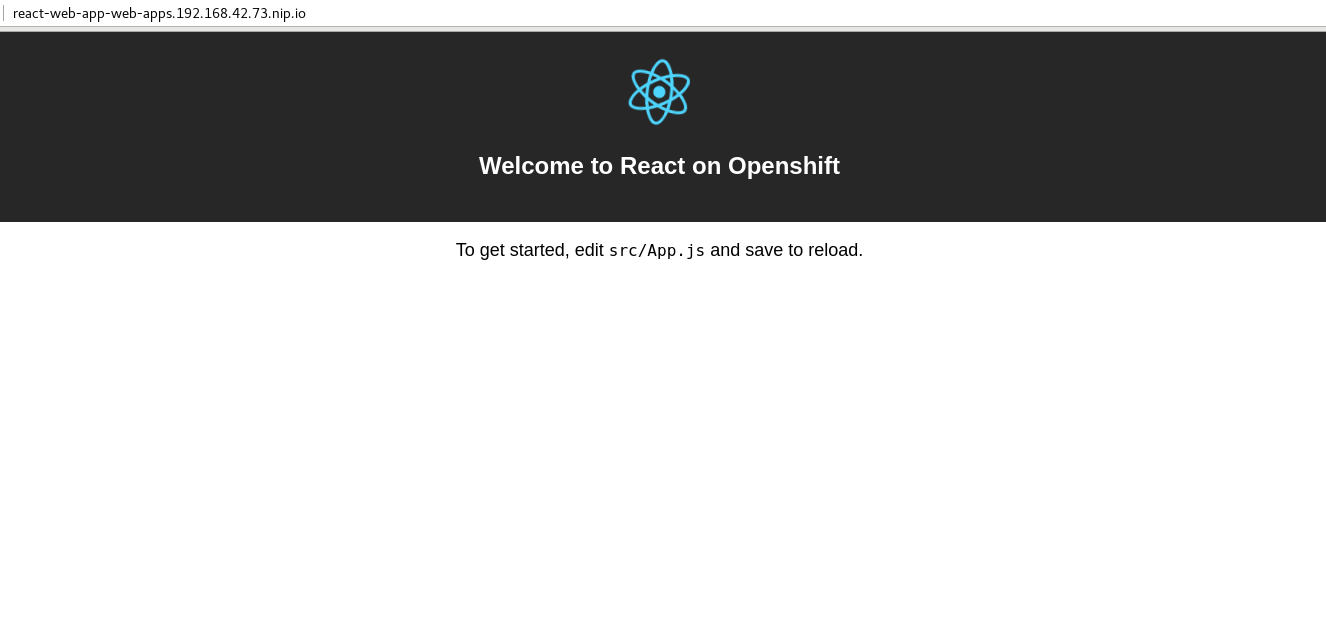
Clicking the link should navigate to our application, which is the default React App page:
For those who are into using Angular, here is an example of that.
The template is mostly the same, except for that OUTPUT_DIR variable.
This post showed how to use the NGINX image as our web server, but it’s fairly easy to swap that out if you wanted to use an Apache server. It can actually be done in one or maybe two (for completeness) steps.
All you need to do is in the template file, swap out the NGINX image for the Apache image.
While the first post in this series showed how to quickly get a modern web application on OpenShift, this post went deeper into what the Web App Builder image is doing and how to combine it, using a chained build, with a pure web server such as NGINX for a more production-ready build.
In the next and final (probably) post, we will take a look at how to run our web application’s development server on OpenShift, while keeping our local and remote files in sync.
